Portrait Workflow
Files to Download:
portrait-dng.zip
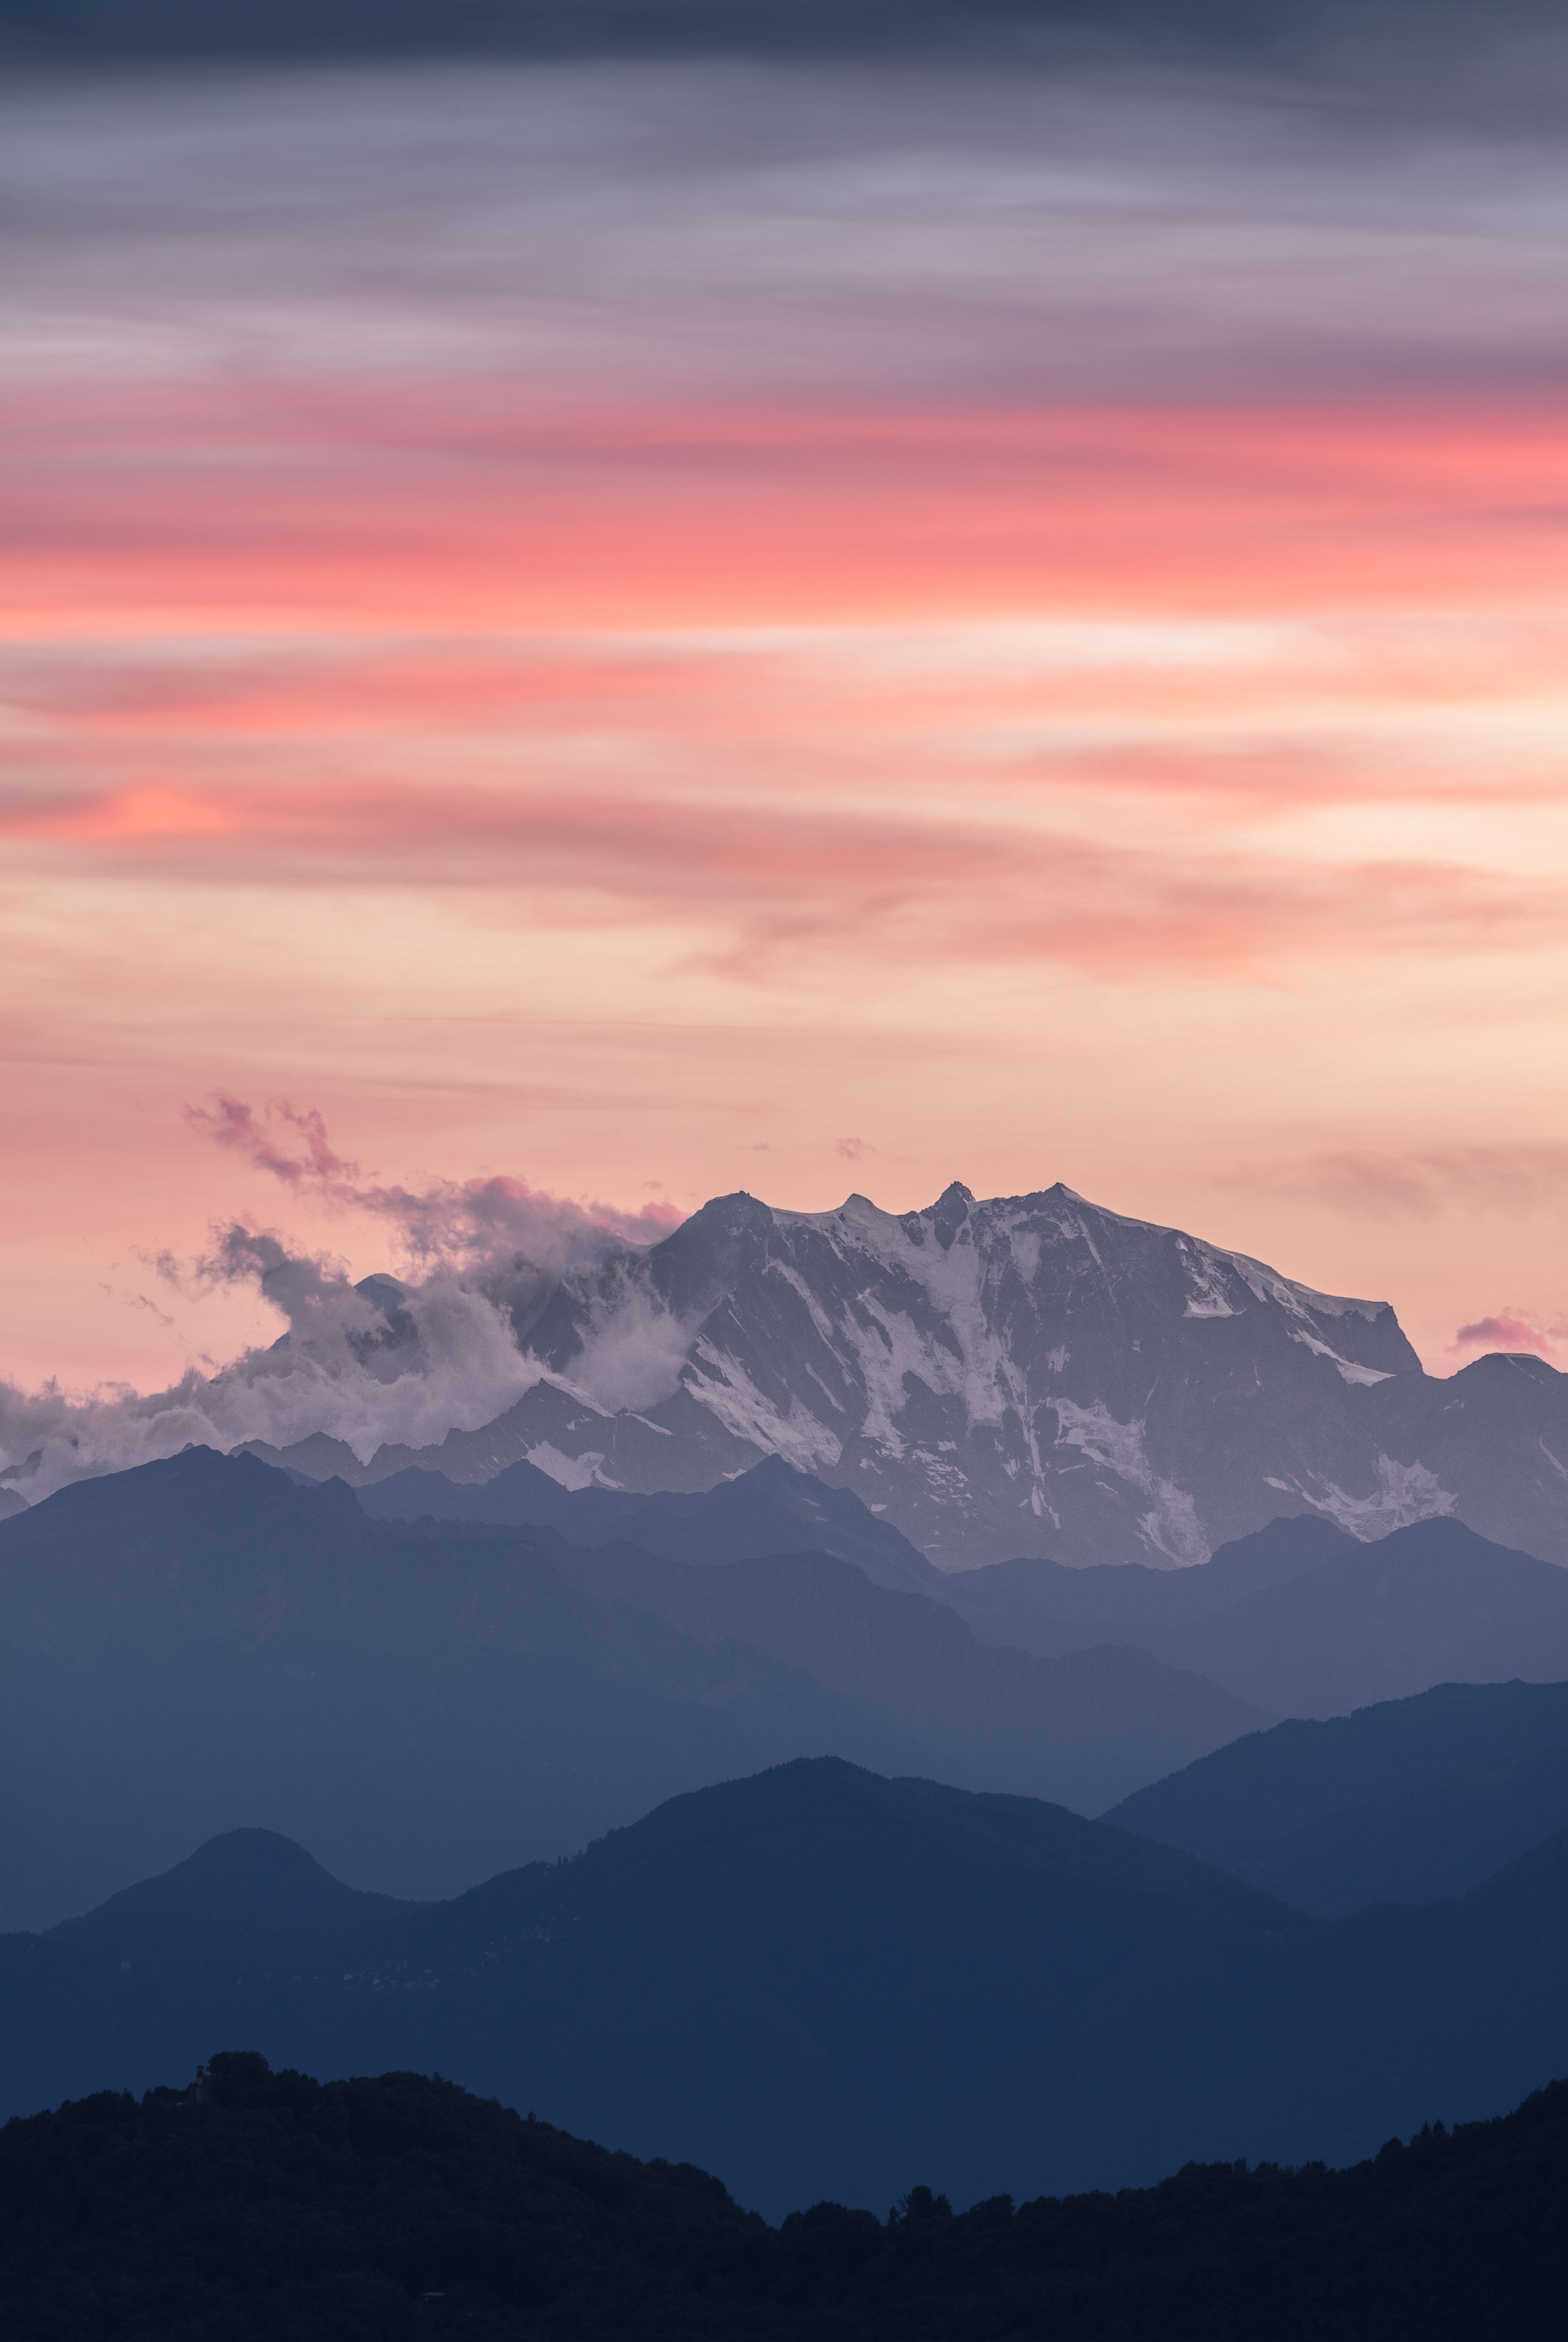
landscape image
Working in Lightroom:
- Create a Catalog (Save to the Root Folder - or main folder)
Import images:
locate the DNG files - click on the Top Left location finder, choose the desired folder
Check All (to select all images in the desired folder)
click the Import button - Lower Right - Working with color cards:
Sample the Neurtral Color with the Eyedropper Tool
Copy the Develop Setting > White Balance (right click)
Paste the Develop Setting to the three images (not the other color card images) - Open the Frontal Portrait image
Only adjust the settings under "Tone" - Click on the Profile Portrait image
Find the icons in the lower-left that say "R A" (Reference / Active)
Drag the Frontal image to the "Reference" side
Only Tone adjustments - attempt to match the Active to the Reference - Repeat for the Hands (as the Active image and Frontal as the Reference)
- Select the 3 images (Frontal, Profile, Hands)
Right-Click > Edit In > Photoshop
(if you get color profile warnings, choose Use Embedded)
The images should come in as ProPhoto 16bit
Portrait Retouch:
- On only the Frontal Image
- Copy the Background Layer - rename "Touch Up"
- Use a combination of Spot Healing and Healing Brush (only on specific areas | do not over-use)
- If satisfied with results, Command E (or Merge Down)
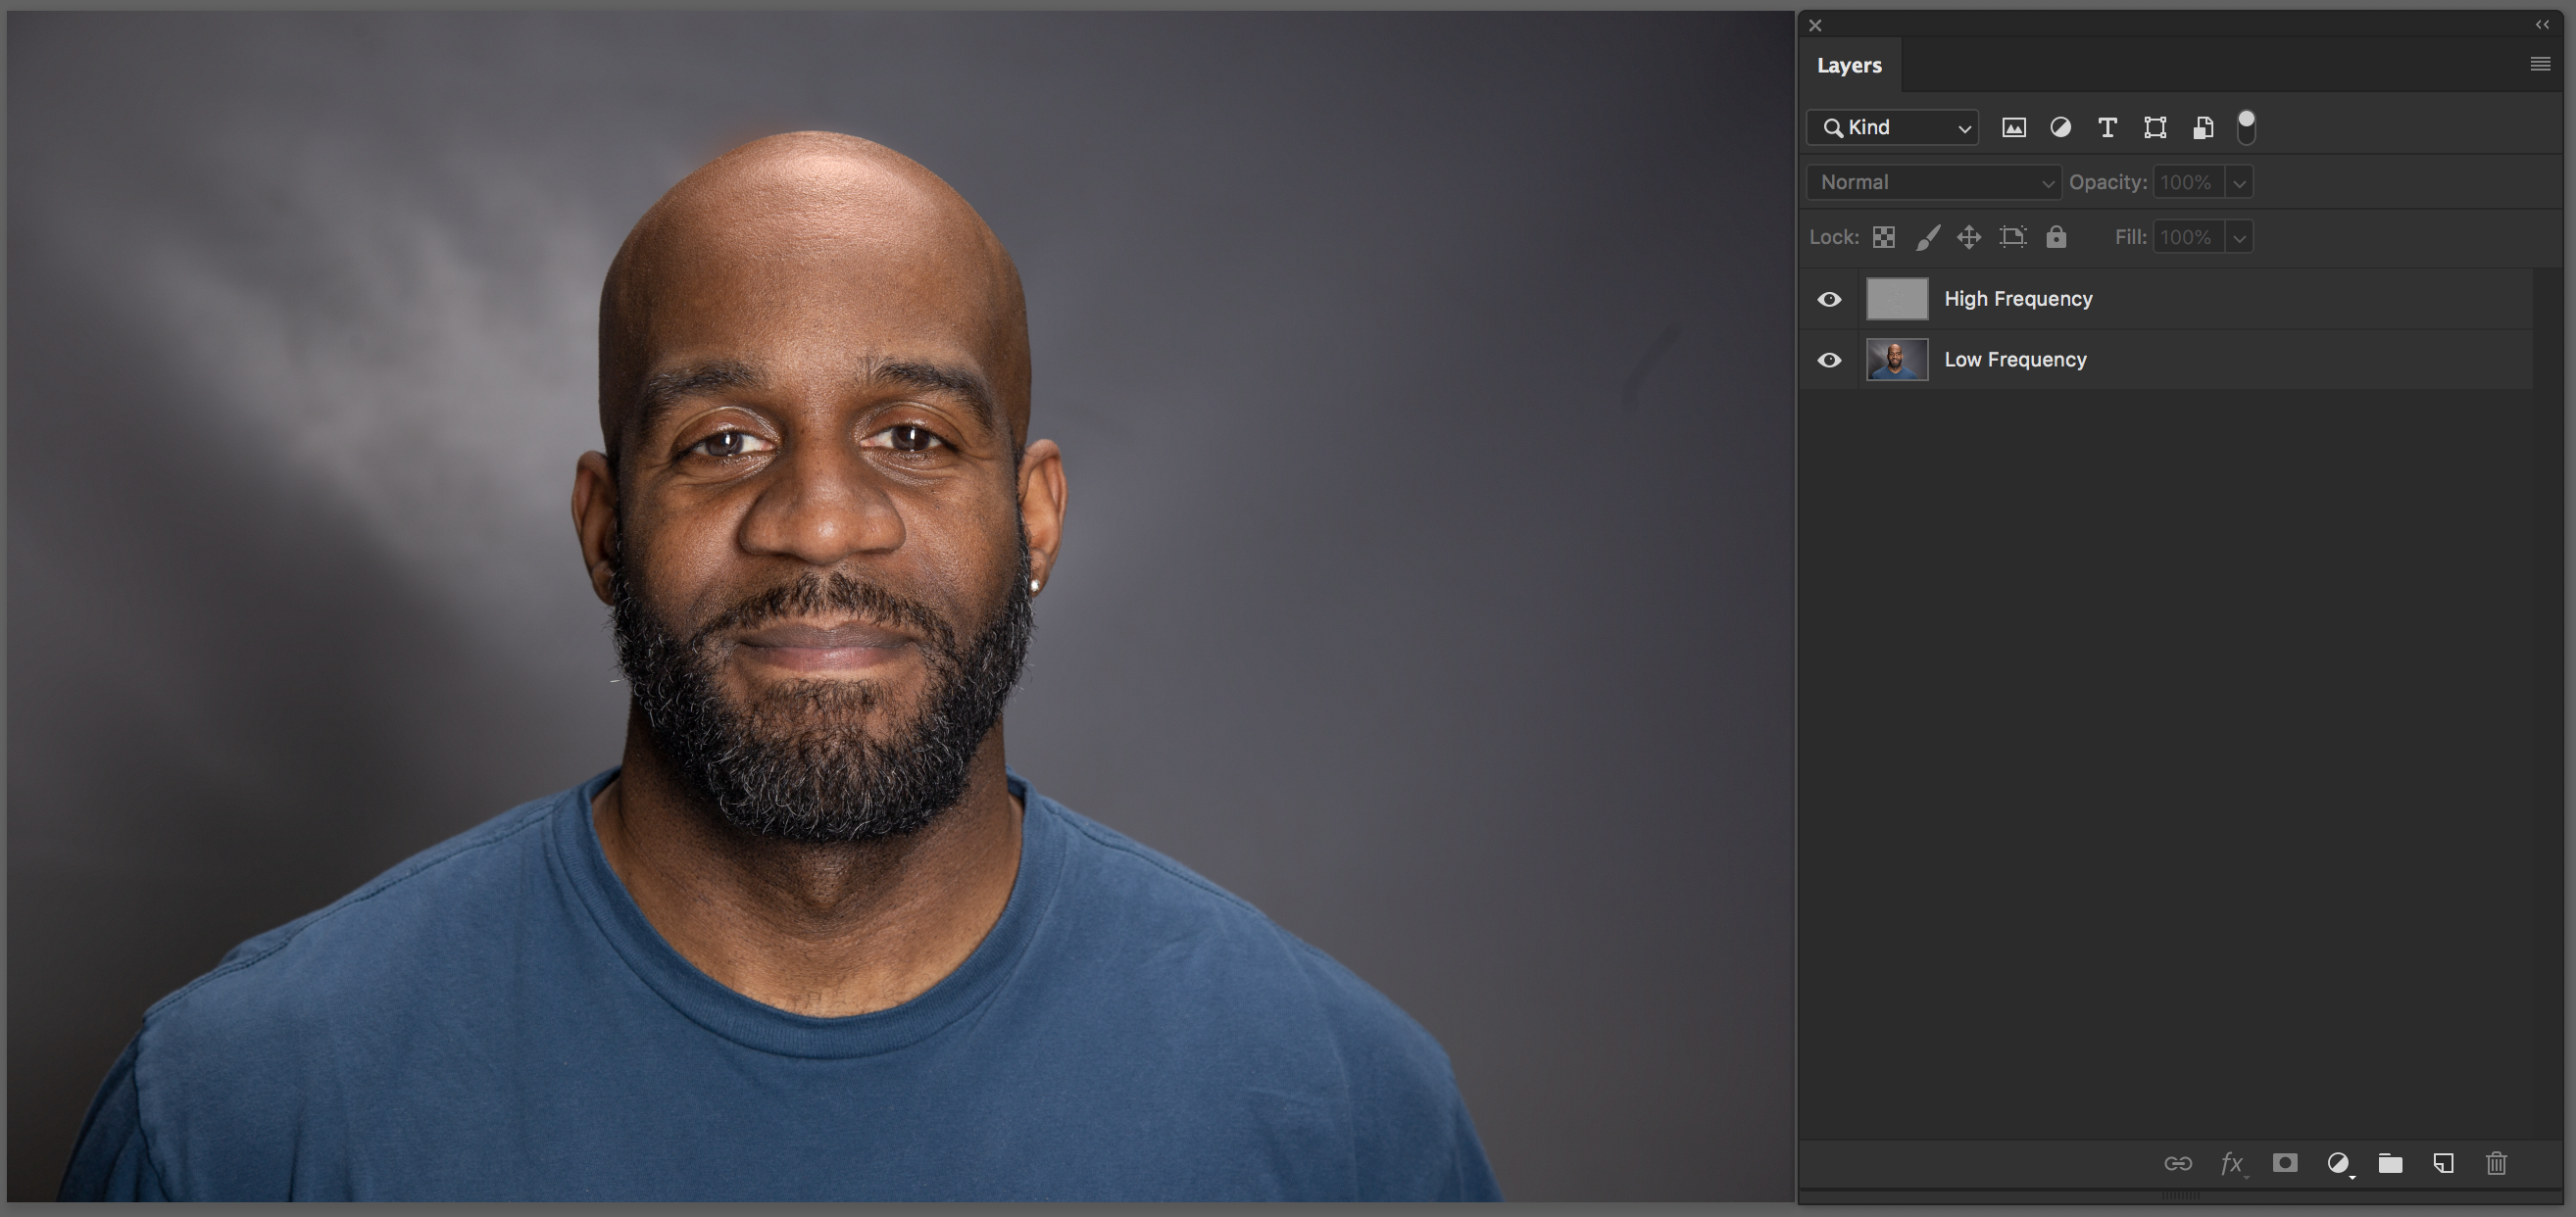
Frequency Separation:
- Copy Existing Layer
- Rename the top: High Frequency
and the bottom: Low Frequency - The top will turned off
on the bottom: use Filter > Blur > Gaussian Blur > (use a radius that is high enough to smooth but not so high it obliterates all of the features - On the Top layer or High Freq
Image > Apply Image
Layer: Low Frequency layer
Blending: Subtract
Opacity: 100%
Scale: 2
Offset: 128
Click: OK - Set the top layer "High Frequency" blend mode: Linear Light
- To Remove Texture Blemishes:
on the High Freq layer, use the Clone Tool (set to current layer) and Option/Click to sample from, then paint or rather Clone over a desire area - To Remove Highlight or Shiny Patches on Skin (or to smooth Color):
on the Low Frequency layer (you can also turn visibility OFF on Top High Freq)
Find the Color Replacement tool (usually under the Paint Brush)
Set to "Color" in the Option Bar
Sample by Option/Click, then paint over the area
*You can also use the Clone Tool (set to current layer, and low opacity) to clone over the area to match color
- (we won't be doing this on our tutorial image)
IF you want to smooth skin textures:
Select with the Regular Lasso, set the Option Bar Feather to something high like: 12px
Filter > Blur > Gaussian Blur (not enough to create damage)
Selection:
- In Photoshop
Layer should be Raster
Quick Select > Select Subject
Add to selection as needed (MAKE SURE YOU CLEAN THE SELECTION) - Select & Mask (if there is HAIR to select)
Refine Edge Brush (toolbox on the left)
Brush - Size larger, only paint along areas where the grey background can be seen - Decontaminate Colors - 100%
- Output As: New layer with layer mask
- Place a Solid Fill Color (any color) behind the new selected layer
When satisfied with results, right-click on layer mask, apply layer mask - * Do this for all 3 images: Frontal, Profile, Hands
Frontal / Profile
- Open the Frontal Image > Save As: Frontal-Profile.psd
- Apply the Mask to the Frontal Layer
- Click on the Profile image layer - Duplicate Layer > Add to the Frontal-Profile.psd
- Layer management: Create a Solid Fill Color Adjustment Layer > set to White, Drag to the bottom
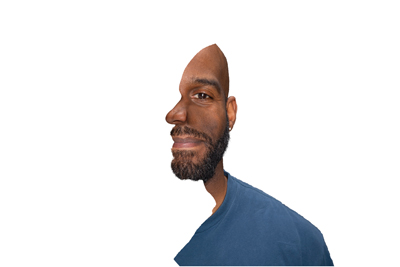
Next Layer: Frontal
Top Layer: Profle - Use the Move tool and move the Profile layer so that the tip of the Nose is matching with the edge of the Frontal nostil
⌘ T > Drage the center Anchor to the edge of the Nose tip > Shift Option and Drag a corner so that the Mouth lines-up together > Hit Return to apply - Apply the Mask to the Top Profile layer > Turn Visibility OFF on Profile layer
- Load the Profile layer as a Selection > ⌘ Click the Raster thumbnail
Click on the Frontal Layer and add Selected Mask > Click the Mask thumbnail > Unlink between the Raster thumbnail and Mask - Top Profile layer > Turn Visibility ON > Add an Inverted Mask (Option Mask icon)
Use your Paint Brush, set to a Soft Edge > Paint with White around the Nose area
You should see both Perspectives now at the same time - To Touch-up where the layers don't quite blend > Create a New Blank Layer > Use the Clone Stamp tool > set to "All Layers" > Option Click and then Brush
- Save
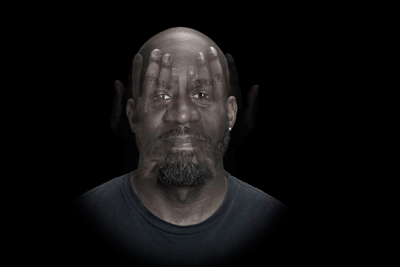
Frontal / Hands
- Open the Frontal image > Save As: Frontal-Hands.psd
Open the Hands image > Duplicate > Add to the Frontal-Hands.psd
- Layer Management: Add a Solid Color Fill Adjustment Layer > Set to Black > Add to the Bottom Layer
⌘J > The Hands Layer > Move under the Black Color Layer (we'll use it layer)
Original Hands layer should be on Top, Frontal image in the Middle
- The Hands may need to be Separated onto their own layers > Select with the Rectangular Marquee around our Right hand >⌘ X > and ⌘V
Move and Rotate (using command T) to place in desired position
- Group the Hand Layers OR - in class I had you Merge Down (⌘ E) for the two Hand Layers >
Add Blend Mode: (I used Lighten) or Cycle through the Blend Modes with: Move Tool Shift+
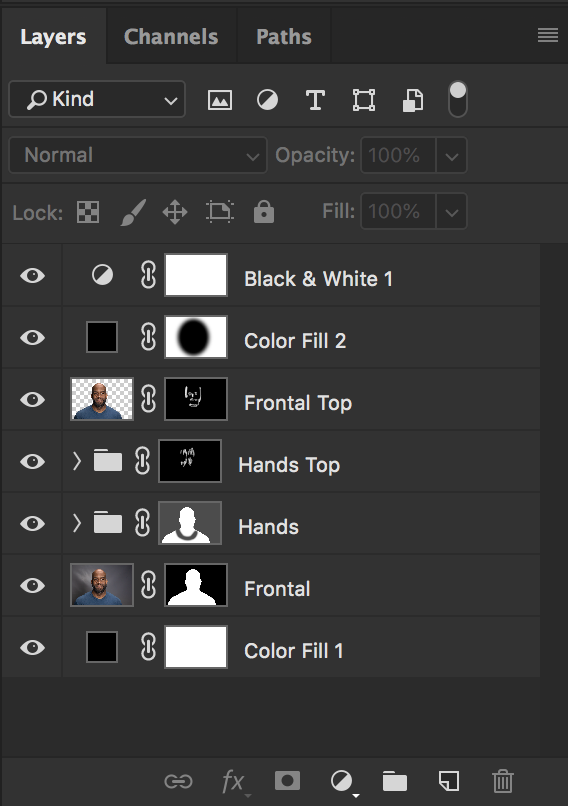
- Add the Frontal Selected Mask to the Hands Layer (Hold Option and Drag the Mask - Make sure it copies and NOT just move)
- Copy the Hands Layer (⌘ J) > Fill the new copy Mask with Black (Shift Delete, Fill with Black) > Rename "Hands Top"
- Copy the Frontal Layer > Place on Top > Apply Mask > Add New Inverted Mask (hold Option and Click the Mask icon) > Rename "Frontal Top"
- On the two Top Layers > Brush the Mask with a 40% Opacity Soft Edge - Just to bring in and out Features that you want to be prominent
- On the Hands Layer Mask > (in the Properties Panel) - Lower the Density to 80%
- Adding a Vignette > Use the Elliptical Marquee tool > Add an Oval around the subject > Goto Select, Transform Selection > And transfrom based on desire shape and placement, Hit Return > Add a Solid Color Fill Adjustment Layer > set to Black > Invert the Mask (⌘ i) > In the Properties Panel, Feather the Mask (160px)
- Add a Black & White Adjustment Layer to the very Top > Adjust the Blues & Reds >
Lower the Opacity to 85% - Save

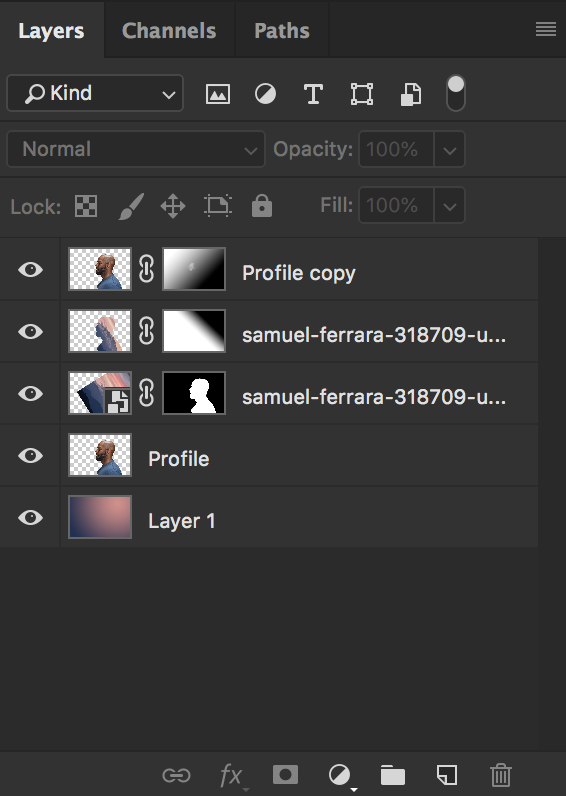
Portrait / Landscape
- Open Profile.psd > Save As: Portrait-Landscape.psd
- Drag a Landscape image into the this image file
- Lower the opacity to 70% and Transform and Cover the Profile image > Apply with Return > Increase Opacity back to 100%
- Add a New Blank layer to the Bottom Layer
- Add a Background Gradient > Select with Eye Dropper (i) the lightest color and use X select the darkest color > G for Gradient and drag a Linear Gradient (you can experiment with a Radial Gradient too)
- On the Landscape layer >Change the Blend Mode to Screen (for now, you can change that)
- Copy Landscape layer > Change Blend Mode to Normal > Right Click / Rasterize Layer > Apply the Mask > Add a new Mask and drag a Linear Gradient across it
- Copy Profile Layer > Add a new Mask and drag a Linear Gradient across it >
Paint with a soft Brush with 15% Opacity in Facial Features that you want more prominent - Save
Portrait Photos: © Marianne Tec, Model: Jermaine Beckley