Intermediate: Combining Custom Brushes & Mixer Brush
Files you will need:
- Image (download or use your own)
- HalfTone.abr (custom brush)
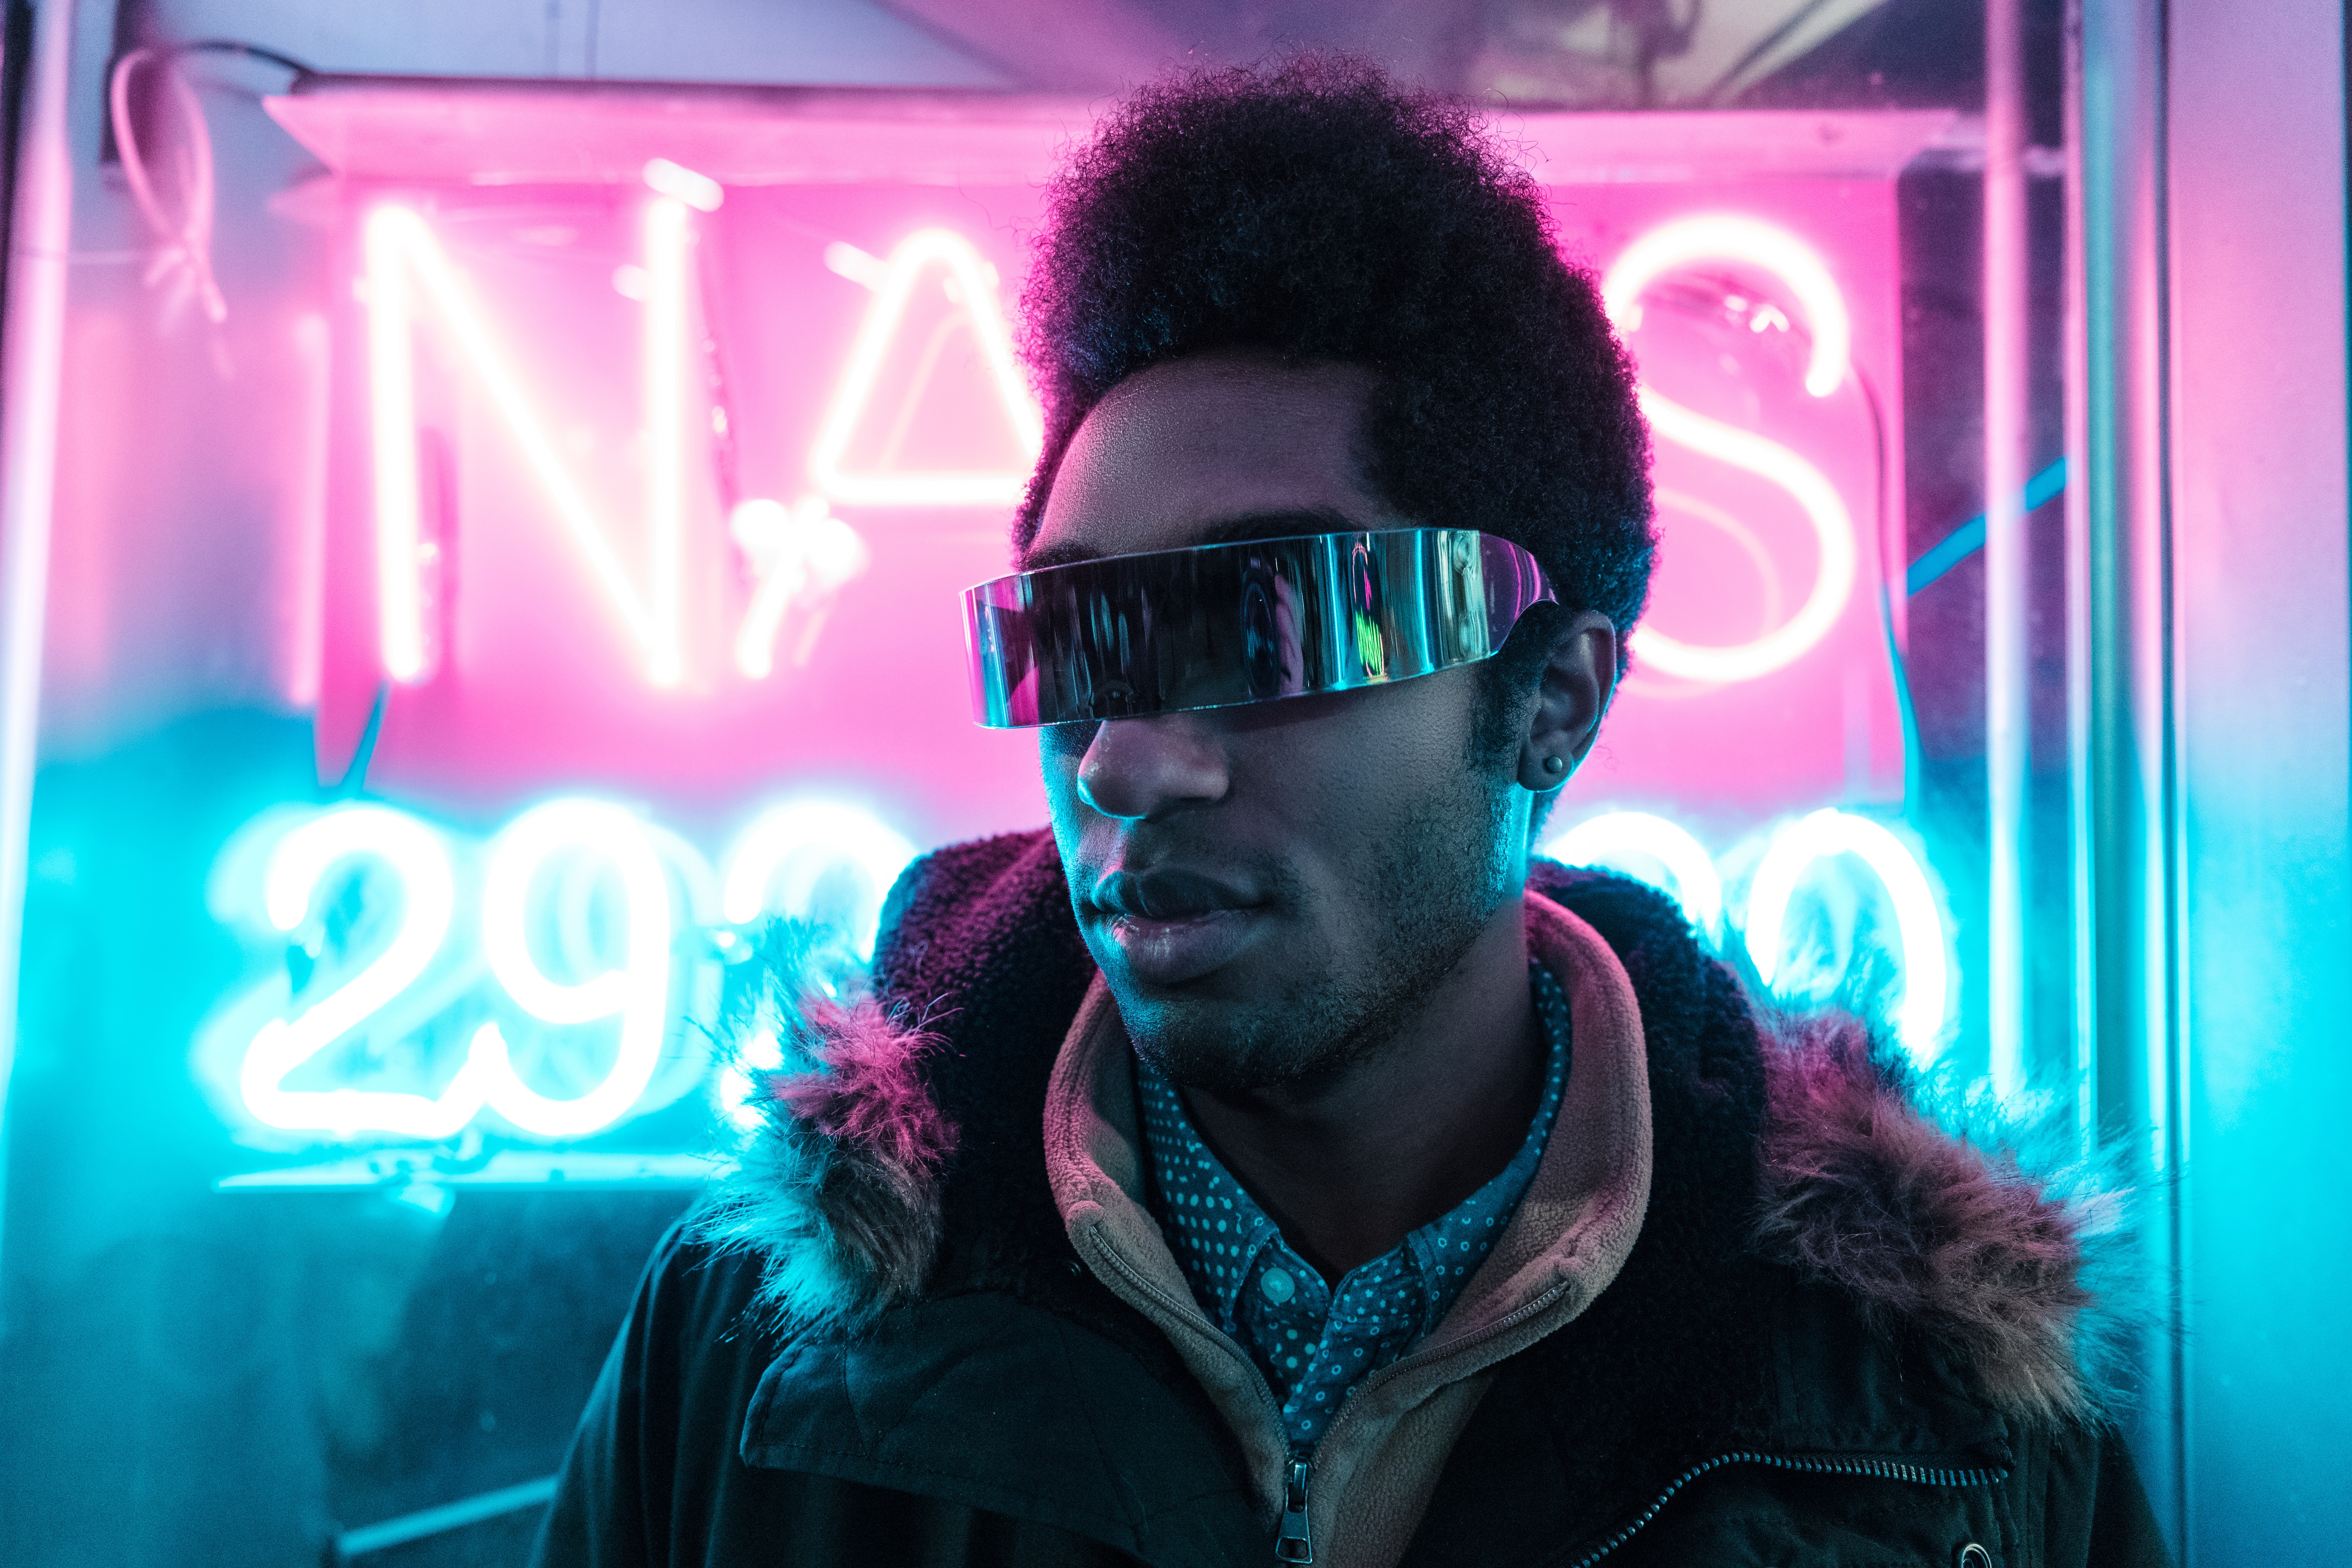
- Open the portrait photo that I have provided (or download / use your own)
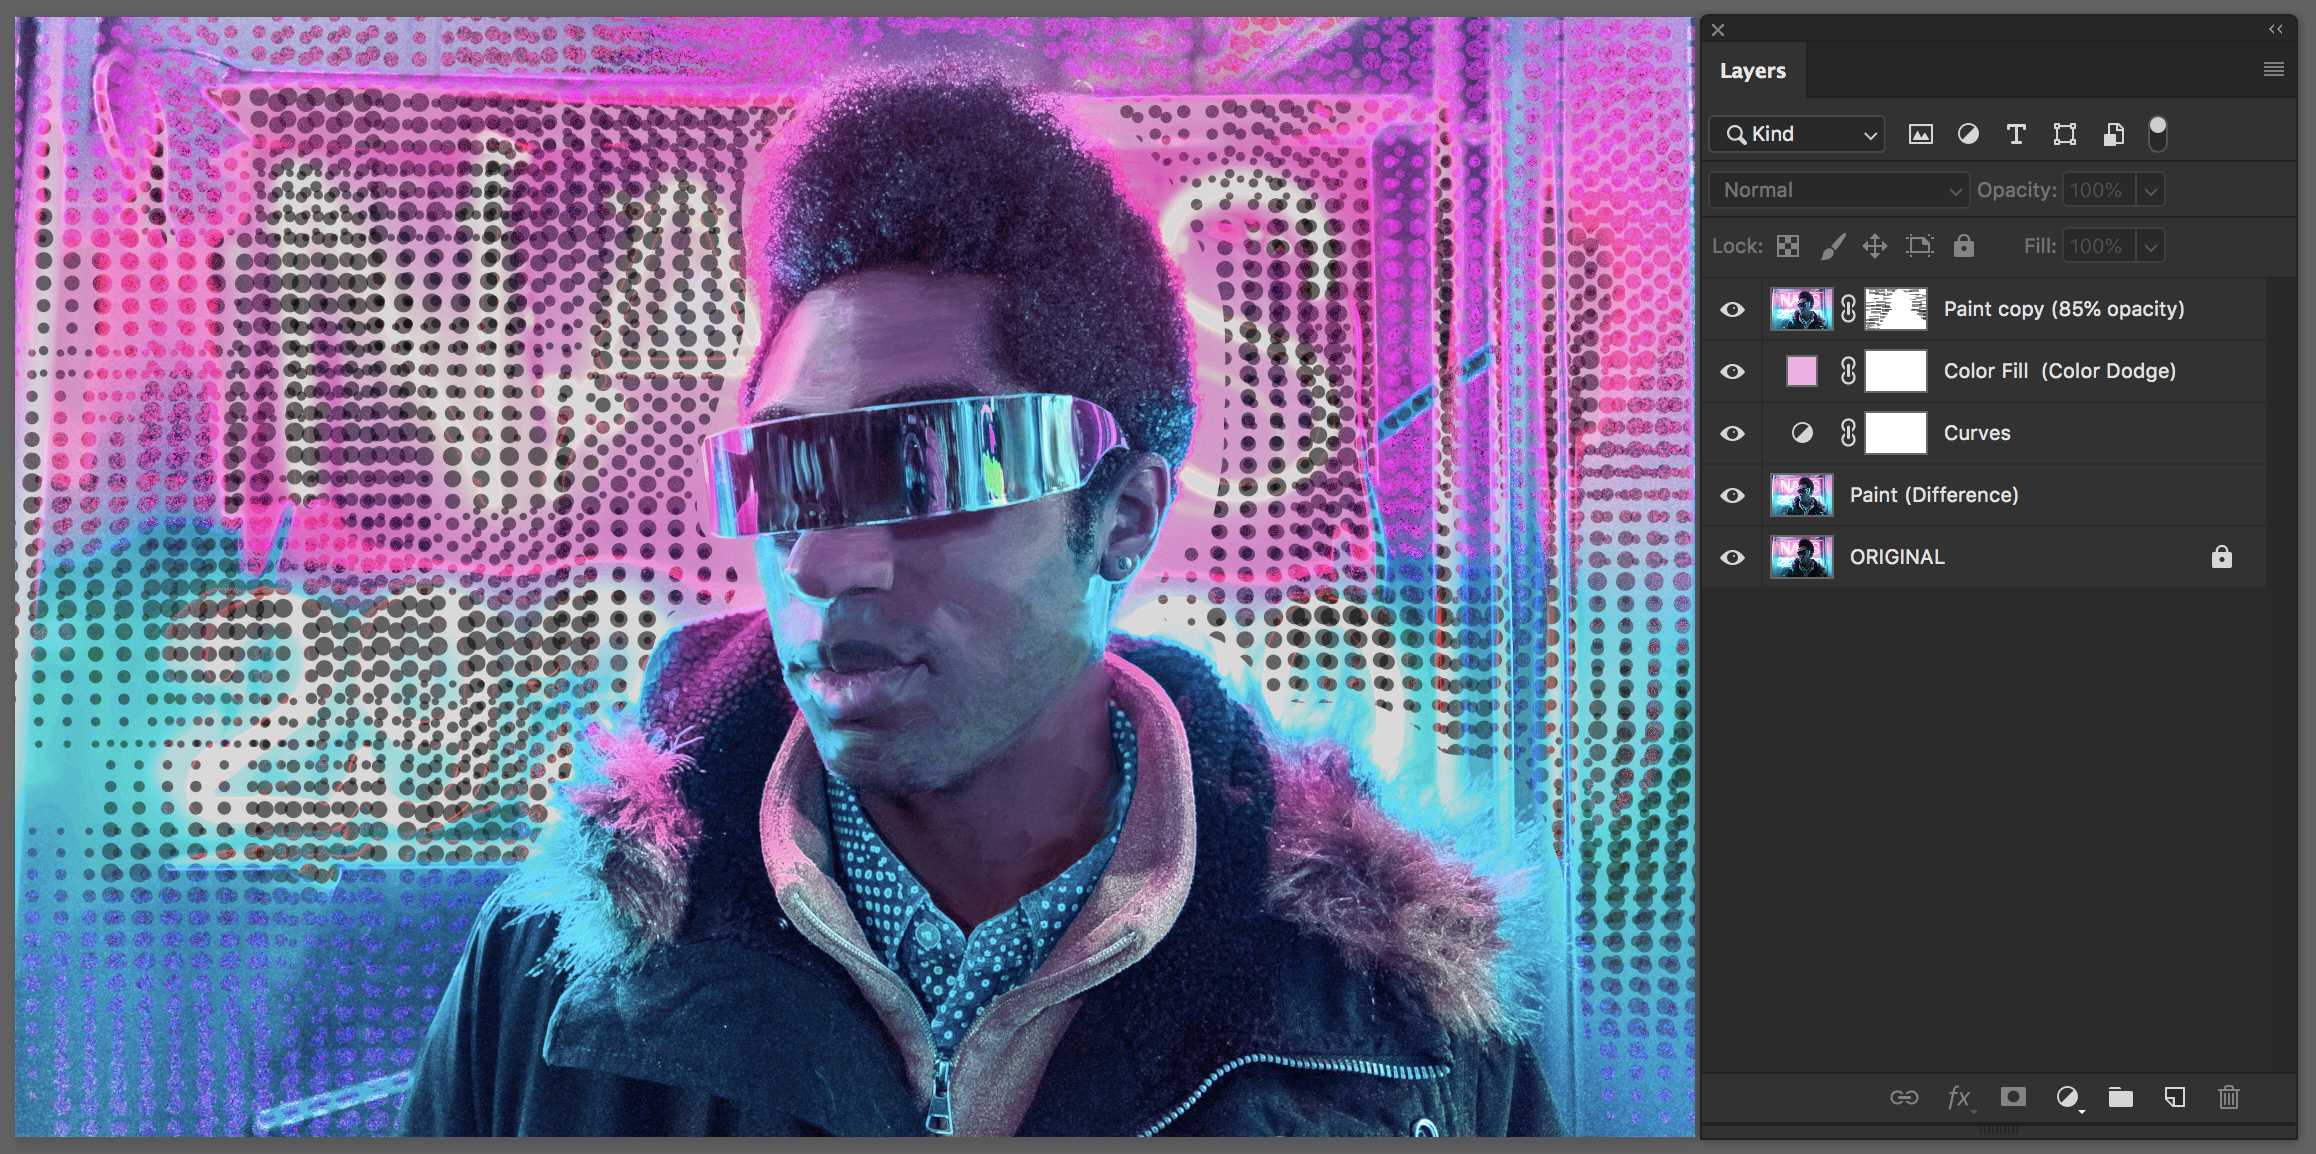
Copy the background layer
Rename: Paint
Rename background layer: Original, and Lock it - On the Paint layer, apply a Filter Brush effect
- Menu Bar > Filter > Filter Gallery > Brush Strokes > Accented Edges
(you can use any from this list, the objective is to generalize the details to make it easier to paint and also so that we don't have to paint the whole image)
- On the Paint layer:
Then you will use one of the "Wet Media" brushes from the Brush Panel:
"Kyle's Real Oils Flex Wet" - This brush is a Mixer Brush. It also has settings in place in the option bar.
You can change the settings.
I recommend to turn OFF "load solid colors only" in the Option Bar drop-down
Also, I prefer to turn ON the "load" and "clean" icons
Sample from an area of the image by Option Click, then paint onto the image.
Essentially you are sampling and blending pixels, but with a paint brush effect.
*For the sake of time, I only painted the face and visor - OPTIONAL: This technique can also be used Non-Destructively: in the option bar, click the checkbox: "Sample All Layers"
In the Layers panel, create a New Blank layer (paper icon), Paint on that blank layer.
The new painted brush strokes will only be on that layer, so you could turn them off or even delete them if you wanted to. - Make a copy of the Paint layer. Turn this top copy off.
- Experiment with Blend Modes on the bottom Paint Layer but then choose "Difference"
- Apply a Curves Adjustment that increases the blacks and brights/mids (in essence you are increasing contrast)
- Download and Load the Brush: HalfTone.abr
- On the top Paint copy layer, Add a Mask
- use the Regular Lasso tool, and Select around the subject's background
- Use the HalfTone Brush and paint on the Mask (using Black) - this will give you the halftone design
- Deselect (⌘ D)
- Lower the Opacity on the layer to 85%
- Add a Solid Color Fill adjustment layer, move it under the top Paint copy layer.
Change the Blend Mode to "Color Dodge"