Double-Exposure
Download this Zip file
- Use a Portrait image & Landscape
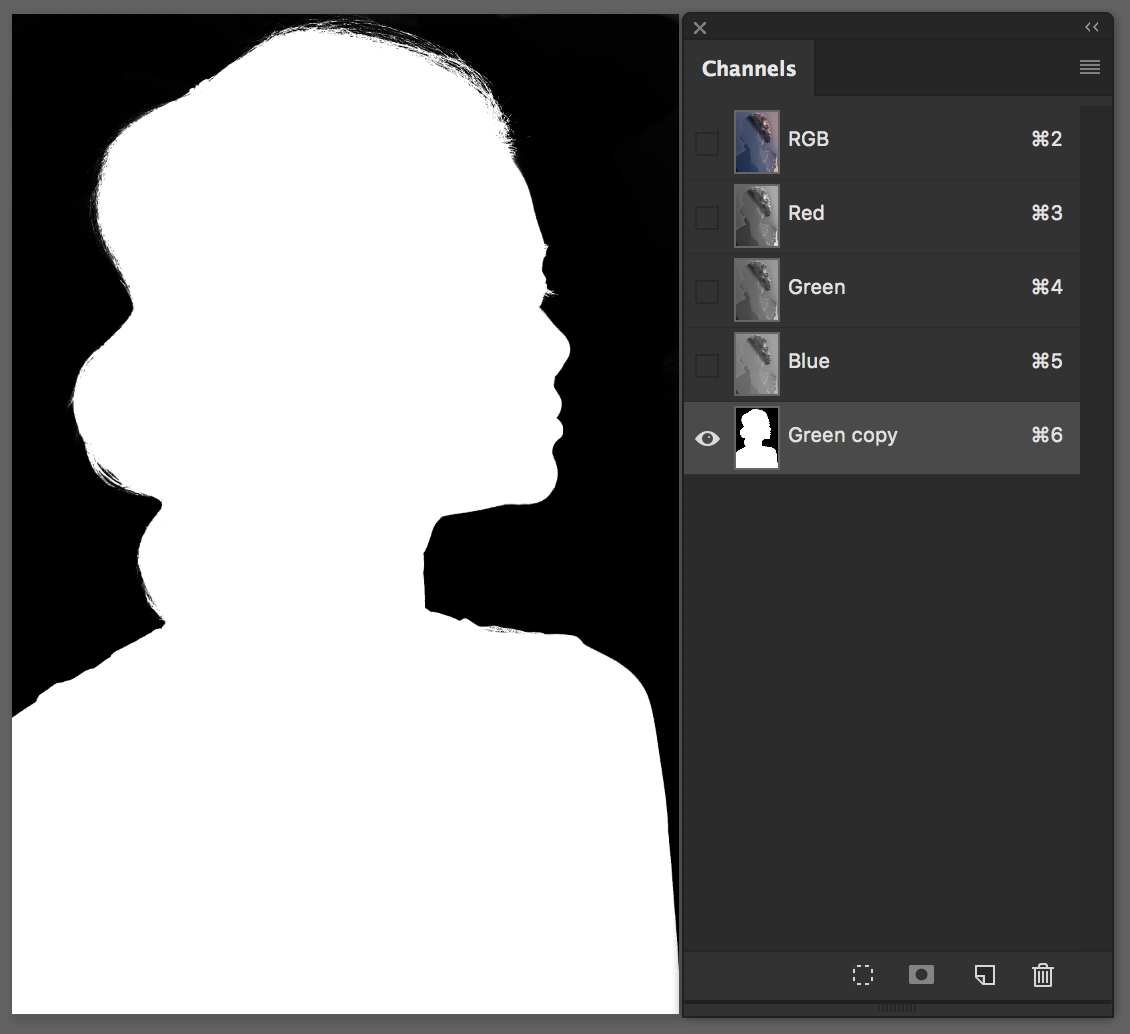
- In Channels, find the color channel with the most contrast
Duplicate - drag to the Paper Icon
- Using ⌘ L, increase contrast (without distorting the edge of the image)
Paint Black into all the highlight areas (clean up the silhouette so that you have a clear selection)
- Load Selection (⌘ Click on the channel icon)
(might have to Select Inverse - Shift ⌘ i)
Copy & Paste on new layer
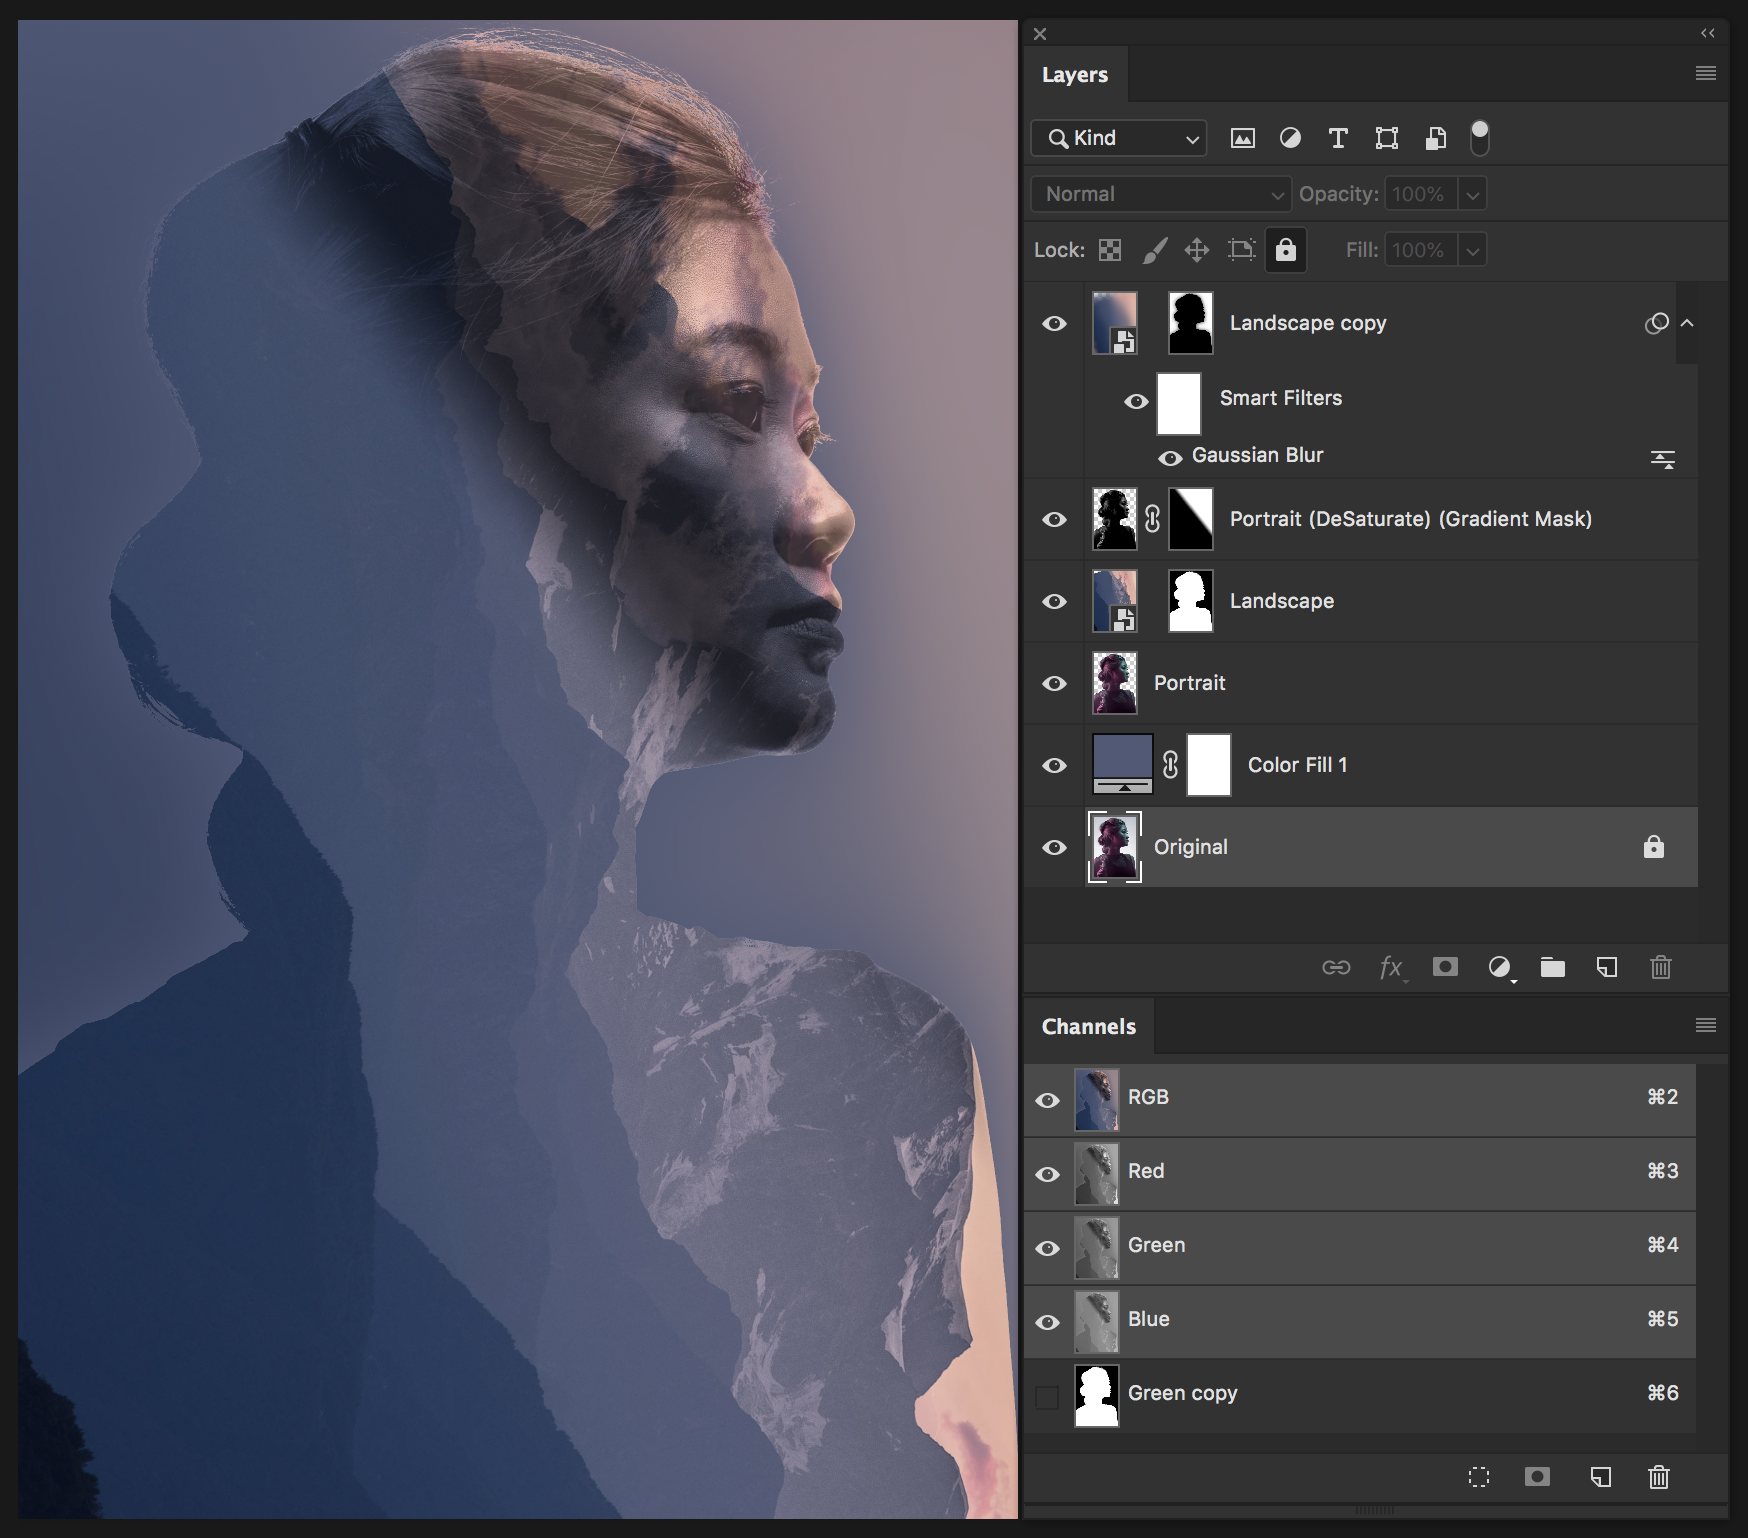
- Add in a Solid Color Fill adjustment layer set to white (initially)
- Paste in the Landscape image (you can drag and drop into the main image)
- Load the Portrait selection, click on the Landscape layer, add a Mask
(the landscape will now be in the shape of the portrait)
- Unlink the raster thumbnail from the mask so that you can move the raster image separately
This gives you the ability to reposition the landscape inside the shape of the portrait
- Use the EyeDropper tool (11x11 average) to select a color from the landscape and add that to the Background fill layer.
- Copy and Move the portrait layer to the top /
- DeSaturate (Shift ⌘ U)
- Set the Blend Mode to Multiply (or Hard Light - experiment)
- Mask out everything BUT the facial features (try a gradient mask)
- Lower layer opacity to about 65%
- (you might need to use a Levels - ⌘ L - and lighten the layer)
- Add another Landscape layer / Filter > Gaussian Blur = 250 px
Add Mask, Using large feathered
Copy original Mask, Invert, Gaussian Blur (so that a halo appears)
Load the original Mask and Fill with Black on the Blurred Landscape layer
Adjust Opacity = 50%
- Add adjustments to the top
experiment with Vibrance, Contrast, and Color shifts