Wet Plate Collodion
files to download:
Collodion-Tutorial.zip
Video Link on the Actual Process for Wet Plate Collodion
Steps:
- This tutorial uses a color portrait photograph. The Original image was adjusted in Lightroom where highlights were toned down and darks were decreased (so that they can be adjusted and possibly increased later). I find it best to use a face that is not smiling. This image also had a relatively shallow depth of field. The Color Space is ProPhoto and the bit depth is 16.
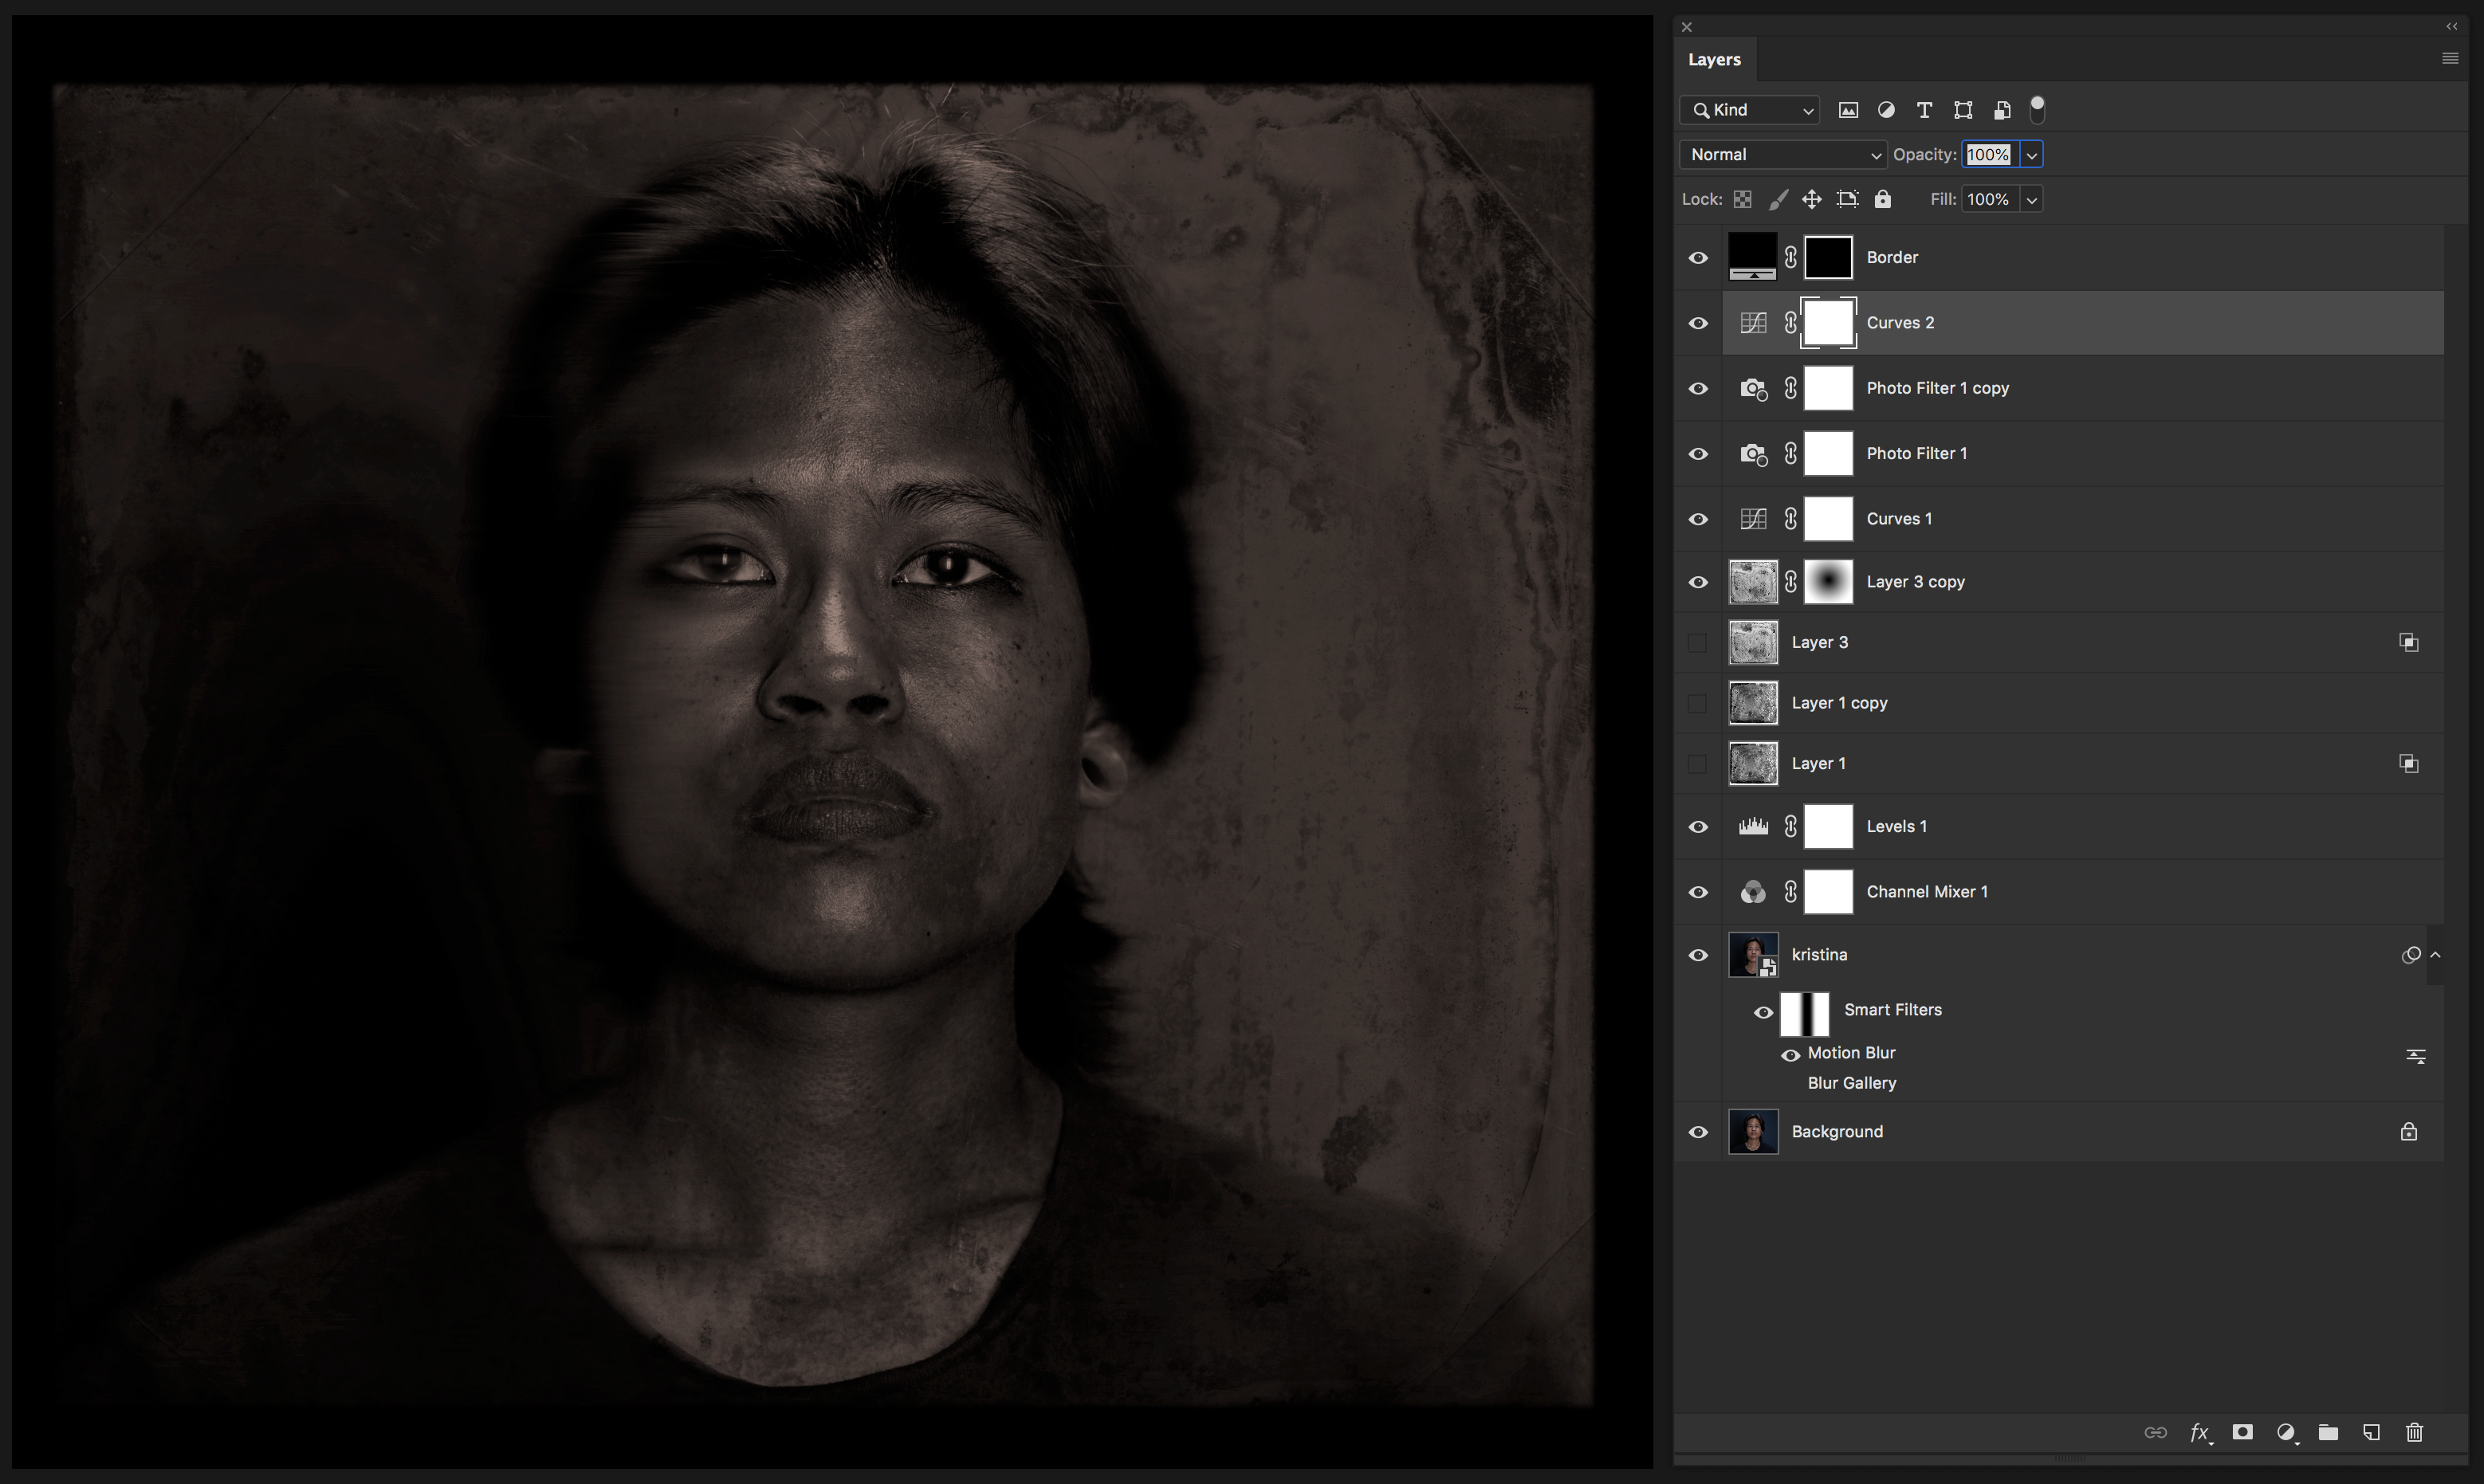
- Once the image is opened in Photoshop, then unlock the Background layer and convert to a Smart Object. This layer will be used later to apply a blur
- Add a Channel Mixer adjustment layer. Click the "Monochrome" box. Decrease the Red channel, increase a bit of the Green channel, And really increase the Blue channel
- Add a Levels adjustment layer and decrease the White Output with the slider
- Add a Blur to the Smart Object layer (the original image). I used Motion Blur and then set up a Gradient that Masks the Blur from the Face but then falls sharply off - use a Reflective Gradient that transitions on both sides.
- Find a Texture and bring it into this image (keep in mind that the color space, bit depth and resolution are very high in this image and your texture image might not match. you can simply click OK on warnings.)
- Texture Blend Modes are normally set to Overlay (though you can experiment). If the texture is too high on the subject's face, then you can add a Radial Gradient Mask and lower the opacity of the layer. You might also want to Copy this layer and experiment with Blend If.
- Adding Monochromatic Color - There are many ways to do this. You can also use Photo Filter and choose a color that matches an alternative process example that you are trying match. I added two and one of those layers I changed the Blend Mode to "Lighten".
- You'll need to add a Curve layer on top to lower and increase tone. And perhaps revisit the original Levels to tweak the output setting and the histogram.
- Add a border to the top - Choose a Selection Marquee Tool (rectangular or elliptical) and drag across your subject. Apply a Black Solid Color Fill and then Blur the Mask on the Properties panel.
- That should do it. Save.
Portrait Photos: © Marianne Tec, Model: Kristina Belantes